Showing posts with label painting. Show all posts

Thursday, October 4, 2012

Finger Painting in a Bag!

 After our Preschool Arts and Literacy club did a project with painting in a bag I knew I needed to do it again! We decided to make some fall leaves - perfect for decorating our home.  For this project all you need are some gallon size plastic bags, assorted paint colors, and full cutouts from cardstock or heavy paper. 


Simply, put your cut out shape in the plastic bag.  Then add some globs of paint.


The the fun begins, all you need to do is spread out, smear, push, and squish the paint all around, trying your best to cover over the entire shape. This turns into a great color mixing activity as well. The best part....the mess stays IN the bag!


Now the actual painting portion of this project is mess free.  However, the mess does happen when you pull out the shapes, put in a new shape, and add paint.  Of course, my little ones had to be part of the switching...and the paint pouring....and well you get it, we got messy!

Our final products were beautiful - they were a melody of all fall colors.


My two LOVE when I use their art work to decorate our home.  These were perfect to use to make a garland.  All I needed to do was punch a hole in them, string through some ribbon.  And now they are part of our fall decoration in our play/school room!


Tuesday, February 21, 2012

Bubble Painting

My love for Pinterest grows daily. There are endless amounts of projects, activities and ideas to be found there. In fact it is where I found this activity.

This was a simple craft that Owl loved.
The best part is you most likely have the supplies you need right at home.

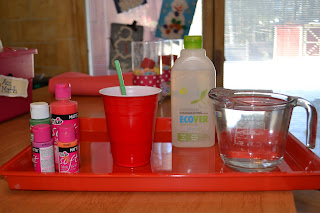
You will need:
dish washing soap
straws
paint ( we used tempera and acrylic)
water
cups - our cups were too large and we ended up switching to smaller cups.


Fill each cup half way with water, add generous squirts of both dish washing soap and paint.
Add more paint and soap as needed. I noticed with our larger cups that by the time the bubbles made it above the cup they had no color to them. When we switched to the smaller cups it worked much better.


Then start making bubbles...


When you become a pro bubble blower you can add two straws: double the straws, double the bubbles, double the fun!

Once you have a good set of bubbles push your paper down onto the bubbles. This will pop the bubbles, but the imprints will be left on your paper. We used cardstock paper which worked well.


Our finished bubble prints....


To get a start on Easter decorating I think I will cut these out into Easter egg shapes and make a garland out of them.